
Brew Journal
A beautiful, offline-first coffee logbook and brewing companion designed to track, refine, and perfect your daily coffee rituals.
A fully functioning instance of the application is available at brew.adityagupta.dev.


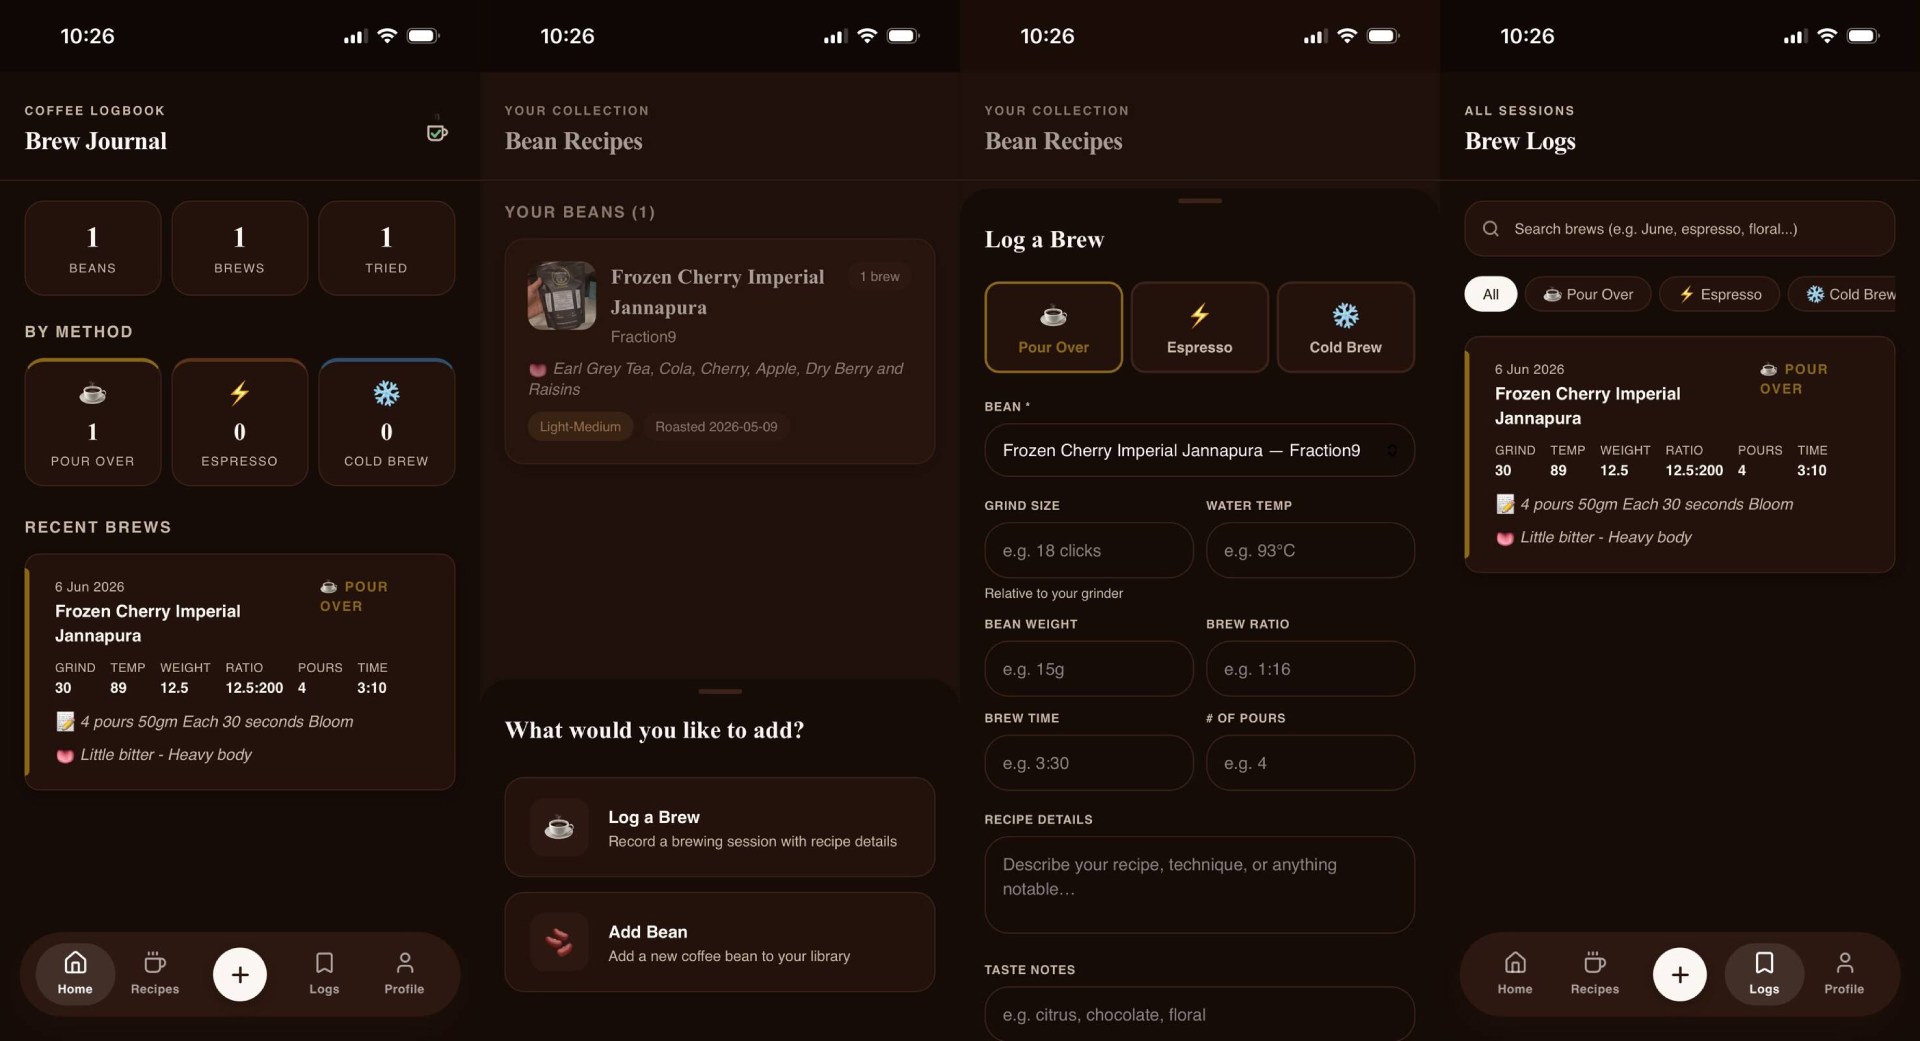
## Screenshots
## Features
- **Coffee Bean Inventory & Recipes**: Keep track of your coffee beans, including roasters, roast levels, origins, processing methods, and personal tasting notes. Save custom brewing parameters for every bean.
- **Detailed Brew Logging**: Record every brewing session with precise details: brew method (Pour Over, Espresso, Cold Brew, etc.), grind size, water temperature, brew ratio, and brew time. Grade your cups with detailed taste notes and reviews.
- **Offline-First Sync Engine**: Fully functional offline using local browser storage (`localStorage`). Automatically merges and syncs to a PostgreSQL database via the Express backend when connectivity is restored, using a conflict-resolution system.
- **Mobile & PWA Ready**: Designed with a sleek, mobile-first responsive layout. Features a custom install prompt modal (including iOS specific guidelines) so you can run it as a standalone app.
- **Modern Dark & Light Mode**: Clean, warm, custom-tailored interface matching the espresso color palette. Persistent theme switching based on user preference.
- **Secure User Accounts**: Personal user profiles backed by JSON Web Tokens (JWT) and `bcrypt` password hashing, plus backend API rate-limiting.
## Architecture Overview
The codebase is split into two main sections:
- **Frontend**: A React application located in the root directory, built with [Vite](https://vite.dev/). Key files include:
- [package.json](file:///home/sortedcord/Projects/brew/package.json) (dependencies and scripts)
- [src/App.jsx](file:///home/sortedcord/Projects/brew/src/App.jsx) (routing and layout)
- [src/AuthContext.jsx](file:///home/sortedcord/Projects/brew/src/AuthContext.jsx) (authentication state and backend communication)
- **Backend**: An Express application located in the [server/](file:///home/sortedcord/Projects/brew/server/) directory. Key files include:
- [server/package.json](file:///home/sortedcord/Projects/brew/server/package.json) (backend dependencies and scripts)
- [server/index.js](file:///home/sortedcord/Projects/brew/server/index.js) (Express application setup, routes, and authentication middleware)
- [server/db.js](file:///home/sortedcord/Projects/brew/server/db.js) (PostgreSQL connection and table initialization)
## Prerequisites
Make sure you have the following installed on your system:
- **Node.js** (v18.x or higher recommended)
- **npm** (v9.x or higher)
- **PostgreSQL** (v14 or higher)
## Getting Started
### 1. Database Setup (PostgreSQL)
You need a running PostgreSQL database instance. Follow the steps below based on your operating system:
#### Installing PostgreSQL
##### Linux (Debian/Ubuntu)
```bash
sudo apt update
sudo apt install postgresql postgresql-contrib
```
The PostgreSQL service should start automatically. If not, start it with:
```bash
sudo systemctl start postgresql
sudo systemctl enable postgresql
```
##### macOS (using Homebrew)
```bash
brew install postgresql
brew services start postgresql
```
##### Windows
Download and run the interactive installer from the [Official PostgreSQL Downloads page](https://www.postgresql.org/download/windows/).
##### Creating the Database and User
1. Log into the PostgreSQL interactive terminal as the superuser `postgres`:
```bash
sudo -i -u postgres psql
```
_(On macOS/Windows, open your terminal/command prompt and run `psql postgres` or use a graphical tool like PgAdmin)._
2. Create a database user with a secure password:
```sql
CREATE USER brew_user WITH PASSWORD 'your_secure_password';
```
3. Create the database and set its owner to `brew_user`. Setting the owner guarantees that the user has full table creation privileges on the default `public` schema:
```sql
CREATE DATABASE brew OWNER brew_user;
```
4. Exit the PostgreSQL shell:
```sql
\q
```
> [!TIP]
> **Troubleshooting "Permission denied for schema public" (PostgreSQL 15+):**
> If you already created the database without setting `brew_user` as the owner and encounter this error, log in as the superuser (`postgres`), connect to the `brew` database, and explicitly grant the schema privileges:
>
> ```sql
> \c brew
> GRANT ALL ON SCHEMA public TO brew_user;
> ```
> [!NOTE]
> Database tables (such as `users`) are initialized automatically when you start the backend server, as defined in [server/db.js](file:///home/sortedcord/Projects/brew/server/db.js).
### 2. Backend Setup
1. Navigate to the backend directory:
```bash
cd server
```
2. Create a [server/.env](file:///home/sortedcord/Projects/brew/server/.env) file by copying the template [server/.env.example](file:///home/sortedcord/Projects/brew/server/.env.example):
```bash
cp .env.example .env
```
3. Open [server/.env](file:///home/sortedcord/Projects/brew/server/.env) and configure the environment variables:
```env
PORT=5000
DATABASE_URL=postgresql://brew_user:your_secure_password@localhost:5432/brew
JWT_SECRET=your_jwt_secret_here
```
_Replace `your_secure_password` with the password you set during the database setup._
4. Install dependencies and start the backend server:
```bash
npm install
npm start
```
The backend should start and display:
```text
Database initialized
Server running on port 5000
```
### 3. Frontend Setup
1. Open a new terminal window/tab and navigate to the project root directory:
```bash
cd /home/sortedcord/Projects/brew
```
2. Install frontend dependencies:
```bash
npm install
```
3. Start the Vite development server:
```bash
npm run dev
```
4. Open your browser and navigate to the local URL printed in the console (usually `http://localhost:5173`).
## Production Deployment
When deploying the Brew application to a production environment, follow these guidelines for security, reliability, and performance:
### 1. Database (PostgreSQL)
- **Restricted Access**: Do not use superuser accounts (such as `postgres`) for backend application connections. Instead, use a restricted role with standard read/write permissions.
- **Managed Databases**: Use a managed database service (e.g., Supabase, Neon, AWS RDS, GCP Cloud SQL) to leverage automated backups, scaling, and high-availability.
- **SSL Connection**: Enforce encrypted database connections by appending SSL options to the connection string (e.g., `?sslmode=require`).
### 2. Backend Server Setup
- **Environment Variables**: In your production environment, set the following environment variables:
- `NODE_ENV=production`
- `PORT=8080` (or whichever port is provided by your host)
- `DATABASE_URL=postgresql://:@:/?sslmode=require`
- `JWT_SECRET=your_long_random_production_secret` (generate a secure 32-byte key using `openssl rand -base64 32`)
- **Process Management**: Use a process manager like **PM2** to run the backend node process, keep it alive, and handle automatic clustering or restarts:
```bash
# Install PM2 globally
npm install -g pm2
# Start the backend server
pm2 start server/index.js --name "brew-backend"
```
- **Restrict CORS**: In [server/index.js](file:///home/sortedcord/Projects/brew/server/index.js), configure the `cors` middleware to only accept requests from your frontend production domain:
```javascript
app.use(cors({ origin: "https://yourfrontenddomain.com" }));
```
### 3. Frontend Build & Hosting
- **Build the static bundle**: Run the build script in the root directory to generate optimized production assets:
```bash
npm run build
```
This generates static HTML, CSS, and JS files in the `dist/` directory.
- **Hosting**:
- Deploy the static files from the `dist/` directory to static hosting platforms like **Vercel**, **Netlify**, **Cloudflare Pages**, or **AWS S3/CloudFront**.
- Alternatively, if using a VPS, serve the `dist/` directory using **Nginx** and proxy API traffic:
```nginx
server {
listen 80;
server_name yourfrontenddomain.com;
# Serve static frontend
location / {
root /var/www/brew/dist;
try_files $uri $uri/ /index.html;
}
# Proxy API requests to backend server
location /api/ {
proxy_pass http://localhost:5000;
proxy_http_version 1.1;
proxy_set_header Upgrade $http_upgrade;
proxy_set_header Connection 'upgrade';
proxy_set_header Host $host;
proxy_cache_bypass $http_upgrade;
}
}
```
> [!IMPORTANT]
> **HTTPS Required for PWAs**: For security reasons, web browsers will only install Progressive Web Apps (PWAs) and register Service Workers when served over a secure connection (`HTTPS`). Make sure to set up an SSL certificate (e.g., via Let's Encrypt / Certbot) for your production deployment domain. Local development on `localhost` or `127.0.0.1` is exempt and will work over HTTP.